Windows 11 PowerShell7 開発環境構築手順
2026/01/17 00:00:00
- bash っぽい開発環境を windows11 で再現しようとした内容。
- 本当は wsl2 ubuntu の方が遥かに開発環境としては便利。
- windowsで開発しないといけない場合、この開発環境がいいかもしれない。。。
1. 準備 #
注意 #
以下のスマートアプリコントロール設定が有効な場合、このページの手順でダウンロードした exe がブロックされる。
スマートアプリコントロール設定をOFFにするか、winget を使ったインストール方法に変更する必要があるが、HOME 環境変数をC:\home\developerに設定するこはできなくなる。よって、msアカウントのユーザ名が日本語の場合、ほぼ確実にこのページの内容は実現できない。
開発者としてなら、スマートアプリコントロール設定をOFFしても問題はないと思われる。※要確認
確認手順:
- Windowsボタン押下で
Windowsセキュリティを入力 アプリとブラウザーコントールを選択スマートアプリコントロールの設定を選択し、表示された内容が ON になっている場合

1-1. 環境変数 PATH 設定 #
環境変数PATHに作業場所を定義する。
ここでは、HOMEをC:\home\developer とする
powershellで以下を実施
# フォルダ作成
New-Item -ItemType Directory -Force "C:\home\developer"

# HOME 環境変数作成
[Environment]::SetEnvironmentVariable("HOME", "C:\home\developer", "User")
- これを定義する理由はmsアカウント等でユーザ名が日本語の場合の不具合対応を含めているためである。
- ユーザ名が日本語でない場合、スキップしても問題ないが、HOMEの箇所はUSERPROFILEに置き換える必要があるので注意
- powershell上では $HOME と $evn:HOME とでは意味が違っているので注意。ここでは $evn:HOME とすること。注意事項は次章参照
※Windows PowerShellにおける $HOME と $env:HOME の違い #
WindowsのPowerShell 7において、これらは「似ているようで全く別物」である
変数の比較表:
| 変数名 | 定義元 | 標準のパス | 特徴 |
|---|---|---|---|
$HOME |
PowerShell | C:\Users\名前 |
PowerShellが内部で管理する変数。cd ~ の移動先。 |
$env:USERPROFILE |
Windows OS | C:\Users\名前 |
Windowsのシステムが標準で定義しているユーザーフォルダ。 |
$env:HOME |
(通常未定義) | 空 または 任意 | Windows標準には存在しない。 Linux由来のソフトが勝手に参照することがある。 |
なぜこれが問題になるのか:
mise は Linux/Unix の文化で作られたツールであるため、設定ファイルを探す際に $env:HOME を優先的に参照しようとする挙動(あるいはライブラリの癖)があります。
- 問題: もし
Git for Windowsや他のツールが$env:HOMEを勝手に設定していると、PowerShellの$HOMEと 「設定ファイルの読み込み先」が食い違う ことがあります。 - 結果:
.python-versionを配置しても、miseが「今どこを基準にファイルを探すべきか」を誤認し、自動認識が動かない原因になります。
1-2. フォント 設定 #
powershellでpowerline系フォントを利用するために必要 ここでは MesloLGS NF Regularフォントを利用する ここ からダウンロードして、ダウンロードされた ttf ファイルをダブルクリックしてインストールする
1-3. その他 #
- マウス右ボタンメニューを旧型式に変更する
PowerShellで以下を実施
反映する場合、windows再起動が必要 また、以下でも実施可能と思われるが画面が崩れる場合があるので再起動がおすすめ
# 念のためにバックアップが必要な場合: cd C:\home\developer reg export "HKCU\Software\Classes\CLSID" backup_clsid.reg # 旧メニュー化実施 reg add "HKCU\Software\Classes\CLSID\{86ca1aa0-34aa-4e8b-a509-50c905bae2a2}\InprocServer32" /f /vetaskkill /f /im explorer.exe & start explorer.exe
2. Poewrshell7 インストール #
注意:
- デフォルトのPowerShell と追加でインストールする PowerShell7 は別管理されるので注意
- ただし、winget 等でインストールしたものはwindowsとして共有されるのでさらに注意
- PowerShellを起動する方法は、Windows11標準でインストールされてある Windows Terminal を利用することを想定している
powershell にて以下を実施
PowerShell バージョン確認すると5系列になっている
$PSVersionTable.PSVersion
Major  Minor  Build  Revision
-----  -----  -----  --------
5      1      26100  7462
PowerShell7 インストール
winget install Microsoft.PowerShell
※国コード(2文字)の送信許可文もでるが何もする必要はない(拒否不可)
※問い合わせが表示される場合は、基本的に [Y] Yes を選択
インストール後、PowerShell7 を起動しバージョン確認すると7系列になっている
※インストール後、Windows Terminalを一旦終了し、再起動すると PowerShell としてメニュー追加される。
$PSVersionTable.PSVersion
Major  Minor  Patch  PreReleaseLabel BuildLabel
-----  -----  -----  --------------- ----------
7      5      4
Windows Terminal の便利設定:
- スタートアップの規定のプロファイルを
PowerShell - PowerShell プロファイルの開始ディレクトリを
C:\home\developerにしておくと便利
3. Git 関連インストール #
3-1. git for Windows をインストール #
PowerShell7 で以下を実施
winget install --id Git.Git
インストール後、PowerShell7 再起動
動作確認:
git --version
git version 2.52.0.windows.1
初期設定を実施
# 勝手改行コードを無効
git config --global core.autocrlf false
# push動作をsimple(デフォルト)
git config --global push.default simple
# 大文字小文字を区別(linux向け,windows os区別できない)
git config --global core.ignorecase false
# 日本語文字化け対応
git config --global core.quotepath false
# pull時にリベースを強制しない(ワーニング削除)
git config --global pull.rebase false
# windowsの場合はfalseにしておくのが無難
git config --global core.filemode false
# git 使用者名
git config --global user.name "John Doe"
# git 使用者email
git config --global user.email "john_doe@xxx.com"
# editor を vim にする(デフォルトがosによって違う)
# ※このvimはgit-bash側にインストールされたものがつかわれるので注意
git config --global core.editor vim
# パスワード保持方法
git config --global credential.helper store
# ※たぶんやるべき。初期ブランチを master ブランチからmainに変更
git config --global init.defaultBranch main

# git エイリアスコマンド追加
# + 管理外ファイルを表示
git config --global alias.untracked 'ls-files --others --exclude-standard'
# + gitignoreファイルを表示
git config --global alias.ignored 'ls-files --other --ignored --exclude-standard'
# + グラフ表示
git config --global alias.graph "log --graph --date-order -C -M --pretty=format:'<%h> %ad [%an] %Cgreen%d%Creset %s' --all --date=short"
# + ステージングファイルをzip圧縮
git config --global alias.zip '!git diff --cached --name-only | zip staged_changes.zip -@'

# for powershell用(日本語ファイルがzip化されない問題対応)
git config --global alias.zip '!git diff --cached --name-only -z | xargs -0 zip staged_changes.zip'
# 内容確認
git config --list
その他:
# git add された ステージング 内容をtxt化
git diff --cached --binary > git.cached
# ステージング 内容を適用
git apply git.cached
3-2. TortoiseGit をインストール(GUI Git クライアント) #
winget install --id TortoiseGit.TortoiseGit -e --source winget
インストール後、Windows を再起動したほうがいいかもしれない…
通常、git for Windows を先にインストールしておけば git.exe パスは自動設定されるため追加設定は不要だが動作しない場合、以下を確認する
TortoiseGit に設定された git.exe のパス確認方法
TortoiseGit → Settings → Git → “Path to Git.exe”
通常、以下になっている。なってない場合は追加設定する
C:\Program Files\Git\bin\git.exe
3-3. gitconfig設定の場所 #
Git の設定は以下の 3 つのレイヤーに分かれて保存
- system
- global
- local
※設定の出所を確認するコマンド:
git config --list --show-origin
system(Git for Windows のデフォルト設定): #
cat C:\Program Files\Git\etc\gitconfig
global(ユーザー設定): #
cat $set:HOME/.gitconfig
ただし Windows では $HOME が未設定のことが多いため、
Git for Windows は次の優先順位で HOME を決定します:
$HOMEDRIVE$HOMEPATH
例:C:\Users\<ユーザー名>%USERPROFILE%
例:C:\Users\<ユーザー名>- 最終的に Windows のユーザーディレクトリを HOME として扱う
※今回の日本語パス対策により、後述のプロファイル設定で $HOME を C:\home\developer に向けるため、global 設定ファイルは以下に作成されます。
C:\home\developer\.gitconfig
local(リポジトリ固有): #
<repo>/.git/config
3-4. tig インストール&設定 #
winget install --id=jonas.tig
notepad $env:HOME/.tigrc で以下を設定
# diff-highlight は設定が必要なんでやめる。以下が参考になるけど、うまく動作しないと思われる。。。
# - Git for Windows だってきれいな差分を見たい
#   https://qiita.com/tomoki1207/items/68d5d8c71fd31bac7451
# # 差分表示に diff-highlight を使う (要 tig 2.2.1 以降. diff-highlight が $PATH にあること)
# set diff-highlight = true

# カラー設定
# カーソル
color cursor black cyan
# diff-view で境界が見やすくなるように変更
color  diff-header       default magenta
color  diff-chunk        black   white
4. oh-my-posh インストール&設定 #
注意:
- ※Microsoft Store版は日本語パス環境でエラーになる場合があるため、バイナリ版を直接導入
- ※oh-my-poshのデフォルトはHOMEディレクトリのbinを見る設定となっているため、
$env:HOME\tools\oh-my-posh;とした場合、特殊な初期化が必要 - **oh-my-poshのテーマは独自作成の
my.capr4n.omp.jsonを使用する - スマートアプリコントロール設定が有効な場合、動作しない場合がある
4-1. my.capr4n.omp.json準備
#
以下の内容を$env:HOME\.config\my.capr4n.omp.jsonに保存しておく
フォルダ作成がなければ以下で作成しておく
New-Item -ItemType Directory -Force
$env:HOME\.config
{
"$schema": "https://raw.githubusercontent.com/JanDeDobbeleer/oh-my-posh/main/themes/schema.json",
"version": 4,
"final_space": false,
"console_title_template": "{{if .Root}} \u26a1 {{end}}{{.UserName}} \u2794 📁{{.Folder}}",
"blocks": [
{
"type": "prompt",
"alignment": "left",
"segments": [
{
"type": "session",
"style": "diamond",
"background": "#61AFEF",
"foreground": "#ffffff",
"trailing_diamond": "\ue0b0",
"template": "{{if .Root}} \uf0e7 {{.UserName}} {{else}} {{.UserName}} {{end}}",
"options": { "display_host": false }
},
{
"type": "path",
"style": "powerline",
"powerline_symbol": "\ue0b0",
"background": "#C678DD",
"foreground": "#ffffff",
"template": " {{ .Path }} ",
"options": { "folder_icon": "\uf115", "folder_separator_icon": " \ue0b1 ", "max_depth": 2, "style": "agnoster_short" }
},
{
"type": "git",
"style": "powerline",
"powerline_symbol": "\ue0b0",
"background": "#95ffa4",
"background_templates": [
"{{ if or (gt .Working.Modified 0) (gt .Working.Deleted 0) }}#FF5C5C{{ end }}",
"{{ if and (eq .Working.Modified 0) (eq .Working.Deleted 0) (or (gt .Working.Untracked 0) (.Staging.Changed)) }}#F7DC6F{{ end }}"
],
"foreground": "#193549",
"properties": {
"fetch_status": true,
"fetch_upstream_icon": true
},
"template": " {{ .HEAD }}{{ if or (.Working.Changed) (gt .Working.Untracked 0) }} \uf044 {{ .Working.String }}{{ if gt .Working.Untracked 0 }} ?{{ .Working.Untracked }}{{ end }}{{ end }}{{ if .Staging.Changed }} \uf046 {{ .Staging.String }}{{ end }}{{ if gt .Ahead 0 }} \u2191{{ .Ahead }}{{ end }}{{ if gt .Behind 0 }} \u2193{{ .Behind }}{{ end }} "
}
]
},
{
"type": "prompt",
"alignment": "right",
"segments": [
{
"type": "time",
"style": "plain",
"background": "#003543",
"foreground": "#ffffff",
"template": " \ue641 {{ .CurrentDate | date .Format }} "
},
{
"type": "executiontime",
"style": "plain",
"background": "#83769c",
"foreground": "#ffffff",
"template": " \ueba2 {{ .FormattedMs }} ",
"options": { "always_enabled": true }
},
{
"type": "python",
"style": "plain",
"background": "#306998",
"foreground": "#ffffff",
"template": " {{ .Full }} "
},
{
"type": "node",
"style": "plain",
"background": "#43853d",
"foreground": "#ffffff",
"template": " {{ .Full }} "
}
]
},
{
"type": "prompt",
"alignment": "left",
"newline": true,
"segments": [
{
"type": "text",
"style": "plain",
"foreground": "#ffffff",
"template": "❯ "
}
]
}
]
}
4-2. oh-my-poshインストール #
PowerShell7 で以下を実施
# 格納用フォルダ作成
New-Item -ItemType Directory -Force "$env:HOME\tools\oh-my-posh"

# 直接バイナリをダウンロード
Invoke-WebRequest -Uri "https://github.com/JanDeDobbeleer/oh-my-posh/releases/latest/download/posh-windows-amd64.exe" -OutFile "$env:HOME\tools\oh-my-posh\oh-my-posh.exe"

$currentPath = [Environment]::GetEnvironmentVariable("Path", "User")
[Environment]::SetEnvironmentVariable("Path", "$env:HOME\tools\oh-my-posh;" + $currentPath, "User")
notepad $PROFILE を実行し以下を追記
※初回は$PROFILEが存在しないのでNew-Item -Path $PROFILE -Type File -Forceを実施すること
存在確認はTest-Path $PROFILEで可能(falseは存在しないことを示す)
# ================================
# oh-my-posh(プロンプト)
# ================================
$ompExe = (Get-Command oh-my-posh).Source
$ompInitScript = & $ompExe init pwsh --config "$env:Home\.config\my.capr4n.omp.json" --print
if ($ompInitScript) {
    $ompInitScript | Out-String | Invoke-Expression
}
メモ: $env:HOME\bin\oh-my-posh.exe に配置した場合、以下の設定でいい
oh-my-posh init pwsh `
  --config "$env:Home\.config\my.capr4n.omp.json" |
  Out-String | Invoke-Expression
インストール後、PowerShell7 再起動
5. zoxide インストール(zコマンド履歴) #
PowerShell7 で以下を実施
winget install zoxide
- fzf インストールしておくとziコマンドが使える
winget install junegunn.fzf
インストール後、PowerShell7 を再起動
基本(ディレクトリ移動) #
z コマンドで移動した履歴のディレクトリを入力すると移動できる zi エンター押下とすると移動履歴が画面下部に表示される。上下キー選択、エンターで移動となる
履歴の確認(リスト表示): #
zoxide query --list
※ 各パスの左側に「スコア(頻度・新しさに基づく重み)」が表示されます。
特定のパスを履歴から削除: #
zoxide remove <パスの一部またはフルパス>
データベースの完全初期化(全削除): #
zoxide の履歴データは以下の場所に保存されています。全履歴を消去して初期化したい場合は、このファイルを削除してください。
# データベースファイルを強制削除して履歴をリセット
Remove-Item "$env:LOCALAPPDATA\zoxide\db.zo" -Force
メモ:PSReadLine(PowerShell本体の履歴) 削除
- PSReadLine の履歴ファイルを空にする
Clear-Content (Get-PSReadLineOption).HistorySavePath - 現在のセッションの履歴を消す
Clear-History
6. posh-git インストール(Git 補完) #
Install-Module posh-git -Scope CurrentUser -Force
7. mise インストール #
以下から最新をダウンロード $set:HOME/tools/mise に配置する
https://github.com/jdx/mise/releases
2026/01/17現在 mise-v2026.1.3-windows-x64.zip をダウンロード
展開して C:\home\developer\tools\mise に配置
# フォルダ作成
New-Item -ItemType Directory -Force "C:\home\developer\tools\mise"
# 以下のように配置する
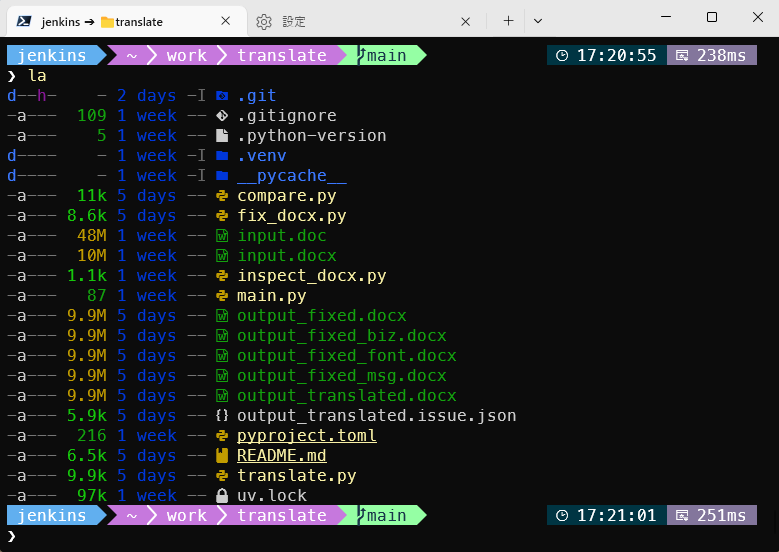
# ❯ la :\home\developer\tools\mise
# d---- - 3 weeks bin
# ----- 1.1k 3 weeks LICENSE
# ----- 6.4k 3 weeks README.md
- ※他にもバージョン管理ソフトがあるが、windowsでは日本語パスで問題が発生しやすのでmiseで対応
(nvs,fnm,pyenv… 言語専用のもがあるが日本語パス問題やバージョン自動切換えが非対応のため却下) - ※2026/01/17現在 miseはGnuPGを使ってインストールするパッケージの検証するので追加でインストールしておく必要があるが、現状この対応をしても WARN は解決しない。。。
mise WARN gpg not found, skipping verificationが発生するのを防ぐwinget install GnuPG.GnuPG - スマートアプリコントロール設定が有効な場合、動作しない場合がある
配置したパスをPATH環境変数に登録する。PowerShell7にて以下を実施
$currentPath = [Environment]::GetEnvironmentVariable("Path", "User")
[Environment]::SetEnvironmentVariable("Path", "$env:HOME\tools\mise\bin;" + $currentPath, "User")
notepad $PROFILE を実行し以下を追記
# ================================
# mise
# ================================
$env:MISE_DATA_DIR   = "$env:HOME\.mise\data"
$env:MISE_CONFIG_DIR = "$env:HOME\.mise\config"
$env:MISE_CACHE_DIR  = "$env:HOME\.mise\cache"

(& mise activate pwsh | Out-String) | Invoke-Expression
mise で管理されたモジュールを一括削除
mise uninstall --all
mise remove node python uv
mise.toml ファイルが存在する場合の環境構築
mise install
実行許可が必要の場合:
# trust する
#  以下のエラーが発生する場合、trust する必要がある。
#  発生例としては「uv から python を呼び出し」の場合である
#  uv → python → mise shim が起動し、mise が `mise.toml` を読みに行てエラーを出している
#  "mise ERROR error parsing config file: C:\home\developer\work\xxx\mise.toml mise ERROR Config files in CC:\home\developer\work\xxx\mise.toml are not trusted. Trust them with mise trust. See https://mise.jdx.dev/cli/trust.html for more information. mise ERROR Run with --verbose or MISE_VERBOSE=1 for more information"
cd C:\home\developer\work\xxx
mise trust

# カレントディレクトリの信頼を削除
mise trust --untrust

# trust 状態の確認
#  - trust 情報はプロジェクト内には存在しない。削除は以下のコマンドで実行(中央集権になるのでmiseの欠点の予感)
mise trust --show

# 特定ディレクトリの trust を解除する
mise trust --untrust C:\home\developer\work\xxx
$env:HOME 配下のディレクトリを信頼させる
# $env:HOME 配下を信頼させる
mise settings set trusted_config_paths $env:HOME

# 設定内容を確認する
mise settings
Key                   Value                    Source
trusted_config_paths  ['\home\developer', "C"] C:\home\developer\.mise\config\config.toml

# 再度無効にする
mise settings unset trusted_config_paths

# 再確認
mise settings
Key                   Value                    Source

# キャッシュの場所
mise cache
C:\home\developer\.mise\cache

# 設定状況確認
mise doctor
version: 2026.1.3 windows-x64 (2026-01-16)
...
インストール/環境変数設定後、PowerShell7再起動
12.1. node インストールと基本操作 #
mise は Node.js のバージョン管理において、.node-version や .nvmrc も(設定次第で)認識可能です。
インストールと設定
# インストール可能なバージョンの一覧を表示
mise ls-remote node
# 特定バージョンのインストール
mise install node@24.13.0
# グローバルに設定
mise use --global node@24.13.0
基本操作
# 現在の Node.js バージョン確認
node -v
# 現在のグローバル設定を確認
mise ls --global node
# インストール済みの node 一覧を表示
mise ls node
# プロジェクトごとにバージョンを指定(.mise.toml 作成)
mise use node@24.13.0
12.2. uv インストールと基本操作 #
Python の高速なパッケージマネージャーである uv 自体も mise で管理するのがスマートです。
インストールと設定
# インストール可能なバージョンの一覧を表示
mise ls-remote uv
# uv のインストール
mise install uv@latest
# グローバルで使用可能にする
mise use --global uv@latest
基本操作
# uv 自身のアップデート(mise経由)
mise upgrade uv
# 現在のグローバル設定を確認
mise ls --global uv
# プロジェクトの仮想環境を作成
uv venv
# パッケージの追加
uv add requests
12.3. python インストールと基本操作 #
mise で Python 本体を管理し、ライブラリ管理は uv に任せるのが現在のトレンドです。
インストールと設定
# インストール可能なバージョンを確認
mise ls-remote python
# 特定バージョンをインストール
mise install python@3.14.2
# グローバルで使用するバージョンを設定
mise use --global python@3.14.2
基本操作
# 現在のグローバル設定を確認
mise ls --global python
# .python-version がある場所で正しく認識されているか確認
mise ls --current
# インストール済み Python の一覧
mise ls python
# カレントディレクトリに .mise.toml を作成し、バージョン指定
mise use python@3.14.2
# 一時的に特定のバージョンで実行
mise x python@3.14.2 -- python script.py
その他共通設定 #
2026/01/17 現在、動作しないのでスキップでいい
.python-version や .node-version を確実に mise に読み込ませるため、以下のコマンドを実行しておくといいかもしれない。
# レガシーファイルのサポートを有効化
mise settings set legacy_version_file true
インストール後、PowerShell7 を再起動
8. Modern CLI Tools をインストール #
ls, cat, grep などを現代的な Rust 製ツールに置き換え、Git の TUI クライアントも導入します。
winget install eza-community.eza       # ls の強化版
winget install sharkdp.bat             # cat の強化版
winget install charmbracelet.glow      # md 簡易表示
winget install BurntSushi.ripgrep.MSVC # grep の強化版
winget install JesseDuffield.lazygit   # Git TUI クライアント
winget install 7zip.7zip # 7zip
インストール後、PowerShell7 を再起動
9. vim インストール&設定 #
インストール:
# インストール
winget install vim.vim

# インストールパスを調べておく
(Get-ChildItem "C:\Program Files\Vim\vim*").FullName
# C:\Program Files\Vim\vim91  <--- これを環境変数に設定する

# 環境変数追加
[Environment]::SetEnvironmentVariable( "Path", $env:Path + ";C:\Program Files\Vim\vim91", "User" )
インストール後、PowerShell7 を再起動
動作確認:
# PATH に Vim が入っているか確認
$env:Path -split ';' | Select-String Vim
# 実行ファイルが見えるか確認
Get-Command vim
vi コマンドで起動させるには $PROFILE 以下を追加
Set-Alias vi vim
notepad $env:HOME/.vimrc に以下を記載する
set noundofile
set nobackup
set noswapfile

" InsertモードでEmacs/Bash風キー操作
inoremap <C-a> <C-o>^
inoremap <C-e> <C-o>$
inoremap <C-b> <Left>
inoremap <C-f> <Right>
inoremap <C-n> <Down>
inoremap <C-p> <Up>
inoremap <C-d> <Del>
inoremap <C-h> <BS>
inoremap <C-k> <C-o>D
inoremap <C-u> <C-o>d0
9. PowerShell プロファイル設定 #
notepad $PROFILE を実行して以下を纏めて記載する
# ================================
# 文字コード・エンコーディング設定
#  - gemini で文字化け対応
# ================================
[Console]::OutputEncoding = [System.Text.UTF8Encoding]::new()
$PSDefaultParameterValues['*:Encoding'] = 'utf8'
chcp 65001 > $null


# ================================
# PSReadLine(基本設定)
# ================================
Import-Module PSReadLine
Set-PSReadLineOption -EditMode Emacs
Set-PSReadLineOption -PredictionSource History
Set-PSReadLineOption -PredictionViewStyle ListView
Set-PSReadLineOption -BellStyle None
# 予測入力のテキストカラー(薄いグレー)
Set-PSReadLineOption -Colors @{ InlinePrediction = "$([char]0x1b)[38;5;244m" }

# ================================
# Tabキーの挙動カスタマイズ
# ================================

# [Tab] キーの設定
Set-PSReadLineKeyHandler -Key Tab -ScriptBlock {
    $line = $null
    $cursor = $null
    [Microsoft.PowerShell.PSConsoleReadLine]::GetBufferState([ref]$line, [ref]$cursor)

    # カーソル位置までの文字列を取得
    $textBeforeCursor = $line.Substring(0, $cursor)

    # 判定条件:
    # 1. 'git ' または 'cd ' で始まっている
    # 2. カーソル直前が '.\' で始まっている(行頭またはスペースの後)
    if ($line -match '^(git|cat|bat|rm|la|ll|notepad|unzip)\s' -or $textBeforeCursor -match '(^|\s)\.\\') {
        # メニュー形式で補完候補を表示
        [Microsoft.PowerShell.PSConsoleReadLine]::MenuComplete()
    }
    # それ以外で ListView(履歴予測)が表示されている場合は、履歴を選択
    elseif ([Microsoft.PowerShell.PSConsoleReadLine]::GetOptions().PredictionViewStyle -eq 'ListView') {
        [Microsoft.PowerShell.PSConsoleReadLine]::NextHistory()
    }
    # いずれにも当てはまらない場合は通常の補完
    else {
        [Microsoft.PowerShell.PSConsoleReadLine]::TabComplete()
    }
}

# [Shift + Tab] キーの設定(逆順・戻る挙動)
Set-PSReadLineKeyHandler -Key Shift+Tab -ScriptBlock {
    $line = $null
    $cursor = $null
    [Microsoft.PowerShell.PSConsoleReadLine]::GetBufferState([ref]$line, [ref]$cursor)

    $textBeforeCursor = $line.Substring(0, $cursor)

    if ($line -match '^(git|cat|bat|rm|la|ll|notepad|unzip)\s' -or $textBeforeCursor -match '(^|\s)\.\\') {
        # 前の候補に戻る
        [Microsoft.PowerShell.PSConsoleReadLine]::Complete()
    }
    elseif ([Microsoft.PowerShell.PSConsoleReadLine]::GetOptions().PredictionViewStyle -eq 'ListView') {
        [Microsoft.PowerShell.PSConsoleReadLine]::PreviousHistory()
    }
    else {
        [Microsoft.PowerShell.PSConsoleReadLine]::TabCompletePrevious()
    }
}


# ================================
# posh-git(Git 補完)
# ================================
Import-Module posh-git


# ================================
# oh-my-posh(プロンプト)
# ================================
$ompExe = (Get-Command oh-my-posh).Source
$ompInitScript = & $ompExe init pwsh --config "$env:HOME\.config\my.capr4n.omp.json" --print
if ($ompInitScript) {
    $ompInitScript | Out-String | Invoke-Expression
}

# ================================
# zoxide(z / zi コマンド)
# ================================
zoxide init powershell --hook prompt | Out-String | Invoke-Expression


# ================================
# mise
# ================================
$env:MISE_DATA_DIR   = "$env:HOME\.mise\data"
$env:MISE_CONFIG_DIR = "$env:HOME\.mise\config"
$env:MISE_CACHE_DIR  = "$env:HOME\.mise\cache"

(& mise activate pwsh | Out-String) | Invoke-Expression


# ================================
# Modern CLI Tools (Aliases)
# ================================
function ls { eza --icons --git --time-style relative @args }
function ll { eza -l --icons --git --time-style relative @args }
function la { eza -la --icons --git --time-style relative @args }
function tree { eza --tree --icons @args }
function lg { if (Get-Command lazygit -ErrorAction SilentlyContinue) { lazygit @args } }
Set-Alias vi vim

# 1. 既存のガチガチに固まった 'rm' エイリアスを強制排除する
if (Test-Path Alias:rm) { Remove-Item Alias:rm -Force }
# 2. 引数をそのまま受け取って強制削除する関数を作る
function rm { Remove-Item @args -Recurse -Force }

# zsh 風エイリアス
function touch { New-Item -ItemType File -Path $args }
11. gemini インストール #
インストール:
miseでnodeがインストールされていること
npm install -g @google/gemini-cli
起動:
# gemini 起動
gemini
初回認証&設定を実施:
# 設定(gemini3.0の利用を許可)
/settings
Preview Features (e.g., models) false -> true に変更

# 認証(ブラウザが起動後、該当のgoogleアカウントでログイン認証)
/auth
10. その他 #
PSReadLine を更新 #
バージョン確認:
Get-Module PSReadLine -ListAvailable
# Script     2.3.6   PSReadLine {Get-PSReadLineKeyHandler, Get-PSReadLineOption, …
# ...
- ListAvailable
インストール履歴一覧が表示される
インストール(管理者権限が必要):
# 安定版(Stable)
Install-Module -Name PSReadLine -Force -AllowClobber -Scope CurrentUser
# プレリリース版
Install-Module -Name PSReadLine -Force -AllowPrerelease
- AllowPrerelease プレリリース版(最新の機能が含まれるバージョン)を含めてインストールします。安定版だけで良い場合は外しても構いませんが、通常は付けることが推奨
- Force 既存の古いバージョンがあっても強制的に上書きインストール
- AllowClobber 他のモジュール(古いバージョンや、システム標準のもの)とコマンド名が重複していても、強制的に上書きしてインストールします。PSReadLineのような「標準で組み込まれているモジュール」を更新する際には必須に近いオプションです。
- Scope CurrentUser 管理者権限(Admin)を使わずに、現在のユーザーフォルダだけにインストールします。システム全体の設定を汚さず、パーミッションエラーも回避できるため、非常に安全です。
winget 関連 #
winget installで警告が出る場合、-e --source wingetを付加する
#
# たとえば、TortoiseGit インストールする場合
winget install --id TortoiseGit.TortoiseGit
# 以下のように-eオプション付与でインストール可能となる
winget install --id TortoiseGit.TortoiseGit -e --source winge
winget インストール済みリスト #
winget list | Select-String winget
.net8 #
rsync #
2026/01/17現在:windows版のrsyncは存在しないので以下は実施できそうにない。 スキップするべき。
- ※cwrsync が同等機能だが、scp/ssh コマンドで参照している .ssh ディレクトリを参照しないので却下
# 実行権限があるか確認
Get-ExecutionPolicy -Scope CurrentUser
# RemoteSigned: 許可, Undefined: 非許可
# ndefined: 非許可 の場合、許可
Set-ExecutionPolicy -ExecutionPolicy RemoteSigned -Scope CurrentUser
# 全ポリシー確認
Get-ExecutionPolicy -List

# rsync インストール用の scoop インストール
# インストール先を C:\Scoop に指定
$env:SCOOP="$env:HOME\tools\scoop"
[Environment]::SetEnvironmentVariable('SCOOP', $env:SCOOP, 'User')

# Scoop のインストール実行
iwr -useb get.scoop.sh | iex

# main バケットを更新
scoop update

# rsync 存在確認
#  rsync は cwrsync の名称で登録されているっぽい
scoop search rsync
# Results from local buckets...
# Name    Version Source Binaries
# ----    ------- ------ --------
# cwrsync 6.4.6   main
# sqlite  3.51.2  main   sqlite3_rsync.exe

# scoop で rsyncのインストール
scoop install cwrsync

# scoop 自体を削除
scoop uninstall scoop
# rm $env:USERPROFILE\scoop すれば完全削除のはず
zip コマンドインストール #
winget install GnuWin32.Zip
winget install -e --id GnuWin32.UnZip

# 単純パス追加:
$currentPath = [Environment]::GetEnvironmentVariable("Path", "User")
[Environment]::SetEnvironmentVariable("Path", "C:\Program Files (x86)\GnuWin32\bin;" + $currentPath, "User")

# すでにパスが含まれていないかチェックして追加
$newPath = "C:\Program Files (x86)\GnuWin32\bin"
$currentPath = [Environment]::GetEnvironmentVariable("Path", "User")
if ($currentPath -notlike "*$newPath*") {
    $updatedPath = "$newPath;" + $currentPath.TrimEnd(';')
    [Environment]::SetEnvironmentVariable("Path", $updatedPath, "User")
    Write-Host "パスを追加しました。PowerShellを再起動してください。" -ForegroundColor Green
} else {
    Write-Host "パスは既に設定されています。" -ForegroundColor Yellow
}
hugo extended 版インストール #
mise で hugo はインストール可能だが extended 版がインストール不可のため winget でインストールする
winget install Hugo.Hugo.Extended
プロキシ設定自動切換え #
ネットワーク状況確認 #
Windows 11 にはプロキシ設定が2系統ある。両者は 自動同期されない
- WinINET(ユーザー向け)
- Windows設定(プロキシ)
- ブラウザ(Edge など)
- GUIアプリ
- WinHTTP(システム向け)
- サービス
- CLIツール
- PowerShell(特に .NET 系通信)
(必ず必要かは不明)powershellの状態を確認し、ieネットワーク設定が反映してない場合、反映しておく
# 設定されたかどうかを確認する
> netsh winhttp show proxy

# プロキシ情報が表示されない場合、
# ie プロキシ設定を有効する
> netsh winhttp import proxy source=ie

# ie プロキシ設定を無効にする
> netsh winhttp reset proxy
windowsのプロキシ設定をpowershell7に自動反映させる。 #
notepad “$env:HOME\proxy_auto_set.ps1”
# proxy_auto_set.ps1
# Windowsのレジストリから設定を読み取る
$proxyReg = Get-ItemProperty -Path "HKCU:\Software\Microsoft\Windows\CurrentVersion\Internet Settings"

# 初期化
$env:HTTP_PROXY = $null
$env:HTTPS_PROXY = $null
$env:NO_PROXY = $null

if ($proxyReg.ProxyEnable -eq 1) {
    $proxyServer = $proxyReg.ProxyServer

    # --- ここでレジストリから除外リストを取得 ---
    # ProxyOverrideにはセミコロン「;」区切りで格納されているため、
    # 一般的な環境変数の形式であるカンマ「,」区切りに置換するとより確実です
    $rawOverride = $proxyReg.ProxyOverride
    $noProxy = $rawOverride -replace ';', ','

    # 環境変数のセット
    $env:HTTP_PROXY = "http://$proxyServer"
    $env:HTTPS_PROXY = "http://$proxyServer"
    $env:NO_PROXY = $noProxy

    Write-Host "------------------------------------------"
    Write-Host "Auto-Proxy status: [ ON ]" -ForegroundColor Cyan
    Write-Host "Server: $proxyServer"
    Write-Host "No Proxy: $noProxy"
    Write-Host "------------------------------------------"
} else {
    Write-Host "------------------------------------------"
    Write-Host "Auto-Proxy status: [ OFF ]" -ForegroundColor Yellow
    Write-Host "------------------------------------------"
}
notepad $PROFILE
...
# 末尾に以下を追加
. "$env:HOME\proxy_auto_set.ps1"
gemini #
install:
npm install -g @google/gemini-cli
gemini コマンド #
# 全セッションリスト
gemini --list-sessions
# Available sessions for this project (6):
#  1. xxx.. (5 days ago) [58343597-6f0b-4e73-ac51-1f02156f2b7a]

# 指定したセッションから再開
gemini --resume {セッションID}
# gemini --resume 58343597-6f0b-4e73-ac51-1f02156f2b7a
gemini 24bitカラー云々の警告が出る場合の対応 #
# for powershell($PROFILE)
$env:COLORTERM = "truecolor"

# for zsh(.zshrc)
export COLORTERM=truecolor
antigravity-awesome-skills #
954 以上の Agentic スキル
https://github.com/sickn33/antigravity-awesome-skills
現状以下の警告が表示されるが特段問題ない様子(同じものらしく間違って登録されている様子)
⚠  Skill conflict detected: "xlsx-official" from "C:\Users\kazunori\.gemini\skills\xlsx\SKILL.md" is overriding the same
   skill from "C:\Users\kazunori\.gemini\skills\xlsx-official\SKILL.md".

⚠  Skill conflict detected: "pptx-official" from "C:\Users\kazunori\.gemini\skills\pptx\SKILL.md" is overriding the same
   skill from "C:\Users\kazunori\.gemini\skills\pptx-official\SKILL.md".

⚠  Skill conflict detected: "pdf-official" from "C:\Users\kazunori\.gemini\skills\pdf\SKILL.md" is overriding the same
   skill from "C:\Users\kazunori\.gemini\skills\pdf-official\SKILL.md".

⚠  Skill conflict detected: "docx-official" from "C:\Users\kazunori\.gemini\skills\docx\SKILL.md" is overriding the same
   skill from "C:\Users\kazunori\.gemini\skills\docx-official\SKILL.md".
グローバルにインストール:
# for windows(powershell7) ※管理者権限が必要
npx antigravity-awesome-skills --gemini --path "$env:USERPROFILE\.gemini\skills"

# for linux
npx antigravity-awesome-skills --gemini
プロジェクト(カレントディレクトリ)にインストール:
# for windows(powershell7) ※管理者権限が必要

npx antigravity-awesome-skills --gemini --path .\.gemini\skills

# for linux
npx antigravity-awesome-skills --gemini --path .gemini/skills
使い方:
# 利用可能なスキルリスト表示
/skills list

# これをやっておくといいらしい。
# activate_skill {スキル名}
# 使用例:`docx-official`のスキルをつかって`docs/manual.docx` の内容を確認し要約できますか?
activate_skill xlsx-official

# 有効になっているスキルを確認する方法
現在 `activate_skill` になっているskillは何?
起動時に指定したスキルを有効にする方法:
GEMINI.md に以下を追記
# プロジェクト指示書
- セッション開始時に、必ず `activate_skill` を呼び出して `docx-official` スキルを有効化してください。
MCP #
**「MCP(Model Context Protocol)を利用する際のトークン消費量の大幅な増大」**に関する注意喚起
https://t.co/DOF6fXDkOC
.gemini/settings.json にmcpServersに必要なmcpサーバを設定する。以下の設定はplaywrightの設定例
{
  "security": {
    "auth": {
      "selectedType": "oauth-personal"
    }
  },
  "general": {
    "previewFeatures": true
  },
  "generationConfig": {
    "temperature": 0,
    "topK": 1,
    "topP": 0
  },
  "mcpServers": {
    "playwright": {
      "command": "npx",
      "args": ["-y", "@playwright/mcp@latest"],
      "env": {
        "PLAYWRIGHT_BROWSERS_PATH": "./browsers"
      }
    }
  }
}
commands #
キャプチャ画像を貼り付ける
.gemini/commands/screenshot_paste.toml
description = "最新のスクリーンショットをプロジェクトにコピーして添付します。"
prompt = """
{{args}}

@@!{powershell.exe -NoProfile -Command "`$p = [Environment]::GetFolderPath('MyPictures'); `$s = Get-ChildItem (Join-Path `$p 'Screenshots\\*') | Sort-Object LastWriteTime -Descending | Select-Object -First 1; if (`$s) { `$d = '.gemini/latest_screenshot.png'; if (!(Test-Path '.gemini')) { New-Item -ItemType Directory -Path '.gemini' -Force }; Copy-Item `$s.FullName `$d -Force; Write-Output `$d } else { Write-Output 'No screenshot found' }"}
"""
使い方:
/screenshot_paste この画像のxxxを確認してください
vscode settings.json #
C:/Users/{ユーザ名}/AppData/Roaming/Code/User/settings.json
"explorer.copyRelativePathSeparator": "/"の設定をすると"" が"/" に強制される(windowsだけかもしれない)
{
    "editor.fontSize": 16,
    "[vue]": {
        "editor.defaultFormatter": "Vue.volar"
    },
    "diffEditor.codeLens": true,
    "glassit.alpha": 245,
    "editor.fontFamily": "'MesloLGS NF', Consolas, 'Courier New', monospace",
    "workbench.editor.enablePreview": false,
    "workbench.iconTheme": "vscode-icons-mac",
    "[json]": {
        "editor.defaultFormatter": "esbenp.prettier-vscode"
    },
    "remote.autoForwardPortsSource": "hybrid",
    "geminicodeassist.project": "lucky-sequence-c3dld",
    "markdown-preview-enhanced.plantumlJarPath": "/home/developer/work/plantuml.jar",
    "window.titleBarStyle": "custom",
    "workbench.colorCustomizations": {
        // タイトルバー(上のバー)
        "titleBar.activeBackground": "#3a3a3a",
        "titleBar.inactiveBackground": "#2f2f2f",
        "titleBar.activeForeground": "#ffffff",
        "titleBar.inactiveForeground": "#cccccc",
        // 左側のアクティビティバー(アイコン縦並び)
        "activityBar.background": "#353535",
        "activityBar.foreground": "#ffffff",
        "activityBar.border": "#444444",
        // 下のステータスバー
        "statusBar.background": "#3a3a3a",
        "statusBar.foreground": "#ffffff"
    },
    "explorer.copyRelativePathSeparator": "/"
}